June 25, 2011

Progress: Last of the benchwork

In my last post I discussed finalizing my track plan for the remaining section of track.   My next step was to then mark it up in photoshop to plan the benchwork, which looked like this:

Thumbnail
As a final sanity check I used a roll of masking take to mark up my floor, Les Nessman style, to ensure it would fit nicely and not create too narrow an asile.  Happy with the dimensions and armed with a plan I then went to my local lumber shop and spent about $35.  Building the table did not take long:

Thumbnail
A friend asked me recently if I had any benchwork advice to offer, as he's about to build his own and I've just been through the process.  My answers:
  • Build all your benchwork, track, and basic wiring before doing any scenery or detail.  You need to run trains to validate you plans and more importantly to test your track.   I've read this advice and ignored it to an extent and gone on to regret it.
  • Plan it on paper first, in detail.
  • Paint the plywood a base color before putting anything on it.
  • Do not assume that your walls are floor are all really squared up 90 degrees.  I've found things do not always fit as expected.  For anything that's going to be flush with a wall or existing benchwork be safe.  Once you cut the piece go walk over to your train table and see how it’ll fit.  You will be glad you did.
  • The 'base' height of my table is 40” high.  If I were starting again I’d do 36 or 38.
  • Plan for access under your table!   Don’t get carried away adding support struts and then box yourself out.  The space down there needs to be accessible.
  • Never have two pieces of flex track meet where a curve or incline begins, or right where two pieces of benchwork meet.
  • Nailing track is better then glueing track.  You will want to move track, or someday expand on things, and it's much easier to make change when you've used nails.
  • Don’t skimp on tools.   Having good tools makes the construction fun and easy.   Fucking about with bad tools makes it arduous.   The first bit of benchwork I built was made with a hand saw and a screwdriver.  It took hours and was never quite right.
    • Buy a miter saw.  I love my miter saw.  This project would be hell without it.  I bought the cheapest one at Home Depot and I really do love it. That said, if I were to buy one anew, I’d go one model up and get one with the laser.
    • Buy a good T square
    • Buy a long steel ruler.  Mine is 48”
    • Buy a good electric screwdriver or impact driver.   I have this pair  which I got at Rona for about $130 on sale.  These are the best tools I’ve ever owned. I didn’t really see the point in getting 2 tools, but they came as a bundle and were about the price of a single impact driver and I figured a spare battery would be good.  Wow did I luck out.  The impact driver is in constant use, and the other I use as a drill for pilot holes.  It’s so handy, it’s small, light, and has power aplenty.  I use these about the house all the time, and the battery lasts a really long time.  I do not think it’s an exaggeration to say that my benchwork would be much less ambitious if I did not own these because I'd be less willing to take on the carpentry challenge.
    • Buy a shop vac.  Your wife will thank you, and they are cheap.
    • Spending an extra $5 on a slightly better pin vice is money well spent.
So there you go.  I hope some of my lessons learned may prevent you learning the same things the hard way.

UPDATE: More progress


June 22, 2011

I work on video games...

I'm a designer.  My job is about a lot of things but at it's core it's mainly about figuring out what should be happening to the player as he plays the game and then communicating that to others.  I've been doing this for a while now and I believe some of the lessons of game development are applicable to building a layout.  Either that or I have a hammer and so everything looks like a nail.  In any case, here's my theory:

- Novice designers are naturally inclined to overdevelop an idea.   If left in a vacuum a designer a will  come up with too many rules, too many systems and too much work to make the schedule.  Being emotionally invested in this grand design, the designer will defend it to the hilt, despite it's flaws.  We like what we invest in.

- The games designers tend to come up with when indulging their whims and not thinking of the consumer are objectively speaking not very good.  Despite being very deep, intricate, and clearly labors of love they tend to be too complicated, un-intuitive and require much to much work for the end user to make sense of.

- Experienced designers usually know this.  They know that the product usually gets better when elements are removed, not added.  The maxim is that it's not done till there is nothing left to be cut.  This ensures that the remainder, the final product, is all vital to the experience and all the extraneous bits and fluff have been discarded, ensuring the consumer is left with a cohesive experience.

Is this applicable to building an N scale Swiss alpine layout? Well I've apparently decided to think so.  Here's why:

Many people build their layouts with the goal of getting as much track on the table as possible.  Many layouts have more space taken up by track then everything else put together.  Many layouts seem to be dictated by their dimensions, rather then the other way around. Tracks seem to be arraigned to fit the last free corners of the bench work, rather than the intended contours of the track defining the shape of the bench.  This happens in games too.  We inherit technology and tools and an IP and wind up looking for something we can make from the parts- and the answer usually is a bad game.  I think the same holds true on a layout.

I recognize that we all do this hobby for our own reasons and those reasons need only make sense to us, yet I'm inclined to think that most of us do want to approximate some level of realism in our little worlds. How far we go is a personal choice and I've seen many that take it so much farther then me that it literally makes me uncomfortable, but outside of a switching yard you just don't see a gazillion tracks running side by side eating up all the landscape.  Nothing says toy train faster then a layout so obviously visually at odds with what it attempts to portray.

Tonight I recognized that I'm guilty of the above in my layout design as well.  In the past few days I've finished laying track on the south end of my room, and am now ready to build out my last section of bench.   This next section is rather tricky, it features a lot of elevation changes and a helical section of track.  Before building the table I wanted to take another pass at the math involved and be sure all my clearances were okay.  After about six hours messing about with AnyRail (A great piece of software that I recommend unreservedly) I've revised my track plan, for the better I think- I simplified.

The new plan achieves the same things as the old one, it's manages the elevation changes, it allows a siding along the way and best of all it is way less fussy.  I don't have to worry about a 2" clearance anymore. I still get my train emerging from a dramatic tunnel mouth.  I don't get the wrap around visual wrongness commonly associated with an exposed helix.  It took me hours to get there, yet the product looks so simple, almost like a doodle.  It allows me to add a new element, a little station and an alpine village, which will now be the focal point of that space which was impossible before as it was dominated by a 4 wide jumble of tracks looping on themselves.  So I looked at what I had and the penny dropped- I just simplified it, and so made it better.

Your mileage may vary,  perhaps you like the old design better but here's where I got to.  Your comments would be appreciated.

Original


After 2 hours


After 5 hours

End product

Thumbnail: The big picture

June 15, 2011

The hill becomes a mountain, track testing & more!

Today I continued to blindly plough ahead with my mountain building.   Honestly, I'm not at all sure how this will come out, but at least I'm having a crash at it.   Below you can see the overall progress as it stands now.  I have the far side of the tunnel set in plaster cloth (still drying as I write) and the tunnel roughed in in foam blocks.  My current plan is to build the near side of the tunnel next, in much the same way, and then construct the top separately, and keep it removable to allow access to the track inside.


Innovation abounds!  I've started masking my track before dribbling on it!

I cast abutments for my viaduct using some plaster/spackle type stuff that goes on pink and dries white, which is great.  Tomorrow I'll sand it smooth, square it, and give it a coat of Polyscale "Aged Concrete".  I expect it'll be mostly hidden by my roadbed, but this gap needed filling and what does peek through should look good.


You may have noticed in the first photo that I've got a new shelf on the wall.  I built this three years ago and only now put it up!  Easy project, took an evening, and cost about $15 for lumber and screws and about the same again on flextrack.  I think an extra 1/2" height in the shelves would have made it better, but it serves it's purpose well.

Corner clamps make building stuff like this (and your benchwork) really easy.
On the shelves are some miscellaneous bits and pieces I've been using to test track.  The big green north american box car that entirely does not match anything I own but was a very well intentioned gift) has proven extremely valuable as it is the tallest car I own.  This means it's my tunnel clearance test mule.

On the shelf below are three very long German passenger cars, these are for testing curves for clearances and aesthetics.

Bottom shelf features some very forgiving (read short 2 axle) european freight stock, good to use for watching cars wobble on the tracks to find little kinks and such.

The locomotive on the top right is a BWI E8A with sound, and those of you who have messed about with N scale sound will know that engines like this are bloodhounds for finding connectivity issues.   It need only cross a dirty rail for the sound to cycle through the startup sequence.  Rather then get annoyed I have chosen to embrace this fault detection feature.


Dear Readers:  Was this post more than you wanted to know?  Please leave a comment.  I'm new at this and still groping for the the right balance of content quantity vs. content quality.  Too many rail blogs go dead for weeks at a time, I do not want to be one of those, but I also do not want to waste your time.  Would you rather see one post covering 3 weeks of hill/river/tunnel work, or posts like this one walking you through the details.  Do you want ugly photos showing the process, or pretty pictures of polished results?  Let me know please!

-Jaggy

June 13, 2011

Procrastination, mental blocks, a river update and a new tunnel too!

Yesterday I realized I have been procrastinating.  I have been largely focused on completing my min line, building benchwork segment by segment, laying track, wiring, testing, and on to the next segment- but I have stalled.  The past few days have seen me disassemble a minitrix BR class 3.10 completely, fiddle with the innards, reassemble and repeat about 10 times.  I'll post a review of this locomotive eventually but the sort version for now is this:  It's always been a poor runner, I took it apart to make it better, broke it in three ways, and then spent days sorting it out.   The story has a happy ending thanks to my wife, who in her spare time used to make jewelry and so had the patience and know how to mend my mangled drive rods.  Anyhow, point is, I allowed myself to get hugely distracted and put off the ongoing track project.  I should add, I am really keen to get my track sorted, I can't wait till it actually forms a loop and I can run some trains about without the contant worry of something flying off the table.

So, what's the hold up?  It's me.  To lay the next bit of track I need to cross my river, which means my viaduct needs to be in place, which means the viaduct piers and abutments need to be in place, which means the river needs to be in place (unless I plan to add it after the bridge is fixed, which seems misguided), which means the river banks need to be there, which means the hillside that slopes into the banks needs to be there, which means the hill in the corner probably needs to be there- and I've not built a real hill yet.  And that is the blocker.  Building the hill.  I'e had some abortive attempts at making mountains before, and the product has always been lacking.  Now I'm facing with building a hill on my 'real' layout, the one I want to keep, the one that must be good, and so I've been paralyzed for fear of fucking it up.   I've watched videos, read blogs, looked at photos, gone to a forest to collect dirt and rocks, and done everything else short of actually doing it that I can think of.  

Having realized this I decided to just plunge in.   In the worst case I'll rebuild it many times and it'll eventually be good, and in the best case it'll be good enough for now.  So here I go:


I used cut styrofoam sheets to delineate the internal tunnel shape for the track inside, and then balled up wrapping paper (visible in the back right) to form a shape and went at it with plaster cloth.  I intend to make the tunnel top a removable segment, though I've not worked out how yet.  We shall see.  I have found that any inaccessible track invariably goes wrong, gets dirty or finds some other means to have issues.

In my river, I used that green foam for flower arraigning to form a base and have been casting rocks for my banks.  Had I done this before I would have started in the back and worked my way forward, oh well.


I removed my placeholder plywood bridge (which seemed like a good idea but actually provided no benefit) and put the real one in.  Painting back there will be really hard, but at least the reach in is only 24".  


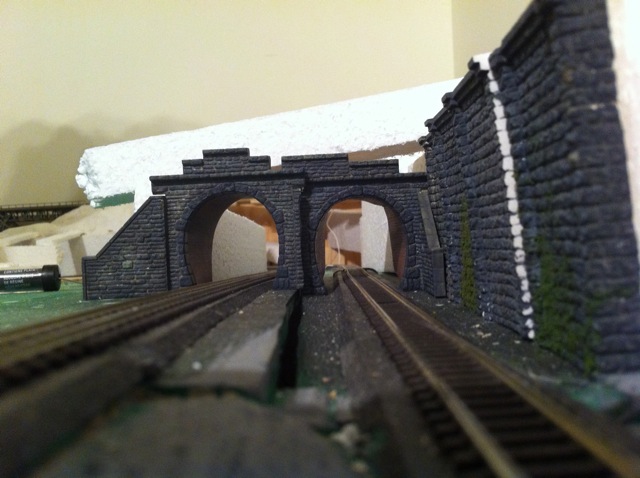
Here's my tunnel portal on the opposite side, just sitting loose, so I can get a sense of it.  You can see the white edge where I've been sanding the walls so they fit flush.   My mossy wall was a happy surprise, I accidentally dribbled some glue, it didn't clean up well, so I dusted the wal with ground cover to hide it and made it better, I think, in the process.  


This will look good one day.  Just you wait and see!


And finally, comments for the blog are now enabled!  Seems they were off by default (thanks Jerry!), so please feel free to add what you will.  I've made it as easy as possible, no 'verify you are a human number codes' or delayed posting.  We'll see how it goes.  Provided I'm not spammed into oblivion I'll leave it as accessible as possible, so you have no excuse!

June 12, 2011

Which kit is it?

This Christmas my friend Mark gave me some kits for my layout, one of them is the Faller 'Wood Plant', here's how it turned out:


So I'm pretty happy with it, and then I noticed something funny on eBay:


Brewery from Model Power

Factory from Atlas


So that got me thinking what other structures do I have that are sold or have been sold under many names from many manufacturers...   So far I've found this:


So this is my Faller 'rock crushing plant':


and it looks a lot like Model Power's Blue Coal Depot:


I don't like this much.  I like Faller, I want to believe in them, as a brand, but if they are just repackaging someone else's old goods, well, what does that say of them?   I guess the counter arguement is that they are keeping product on the market that otherwise would be unavailable.   In the case of the 'lumber plant' above, Faller does incude a crane (pictured) and some wood loads, and a few other bits and bobs that the other versions do not contain, so I guess there's some added value.  Still, before I pay full retail for a kit again I will browse eBay first for an older package.


June 9, 2011

The allure of HO


Sometimes HO really rubs it in.  Sure, going HO would have meant everything would br really compressed, and I'd not get long runs, and probably only have a single mainline and no real sense of travel, but then something comes along and reminds me what I'm not getting in N.   I'm not getting the crazy level of detail, I'm not getting the big sturdy models, the larger selection, and most annoyingly, the really cool new bleeding edge tech like dynamic steam.  Check out the video below.  Note that the steam comes from the pistons, not just the stack.  Then take a deep breath, because this is a $700 toy!


Updated the video link.

June 8, 2011

Goschenen Station Model

In the 'north' part of my layout I plan to have an alpine passenger station, and I have just constructed it.  It is the Faller kit Schwarzach Station with some new signage by me. The kit was a Christmas gift from my friend Mark.  Thanks!   Goschenen is a town at one end of the original 1881 Gotthard tunnel.

As usual, there's no final detailing as I do not yet have a proper place for it, so it sits on painted plywood for now.


June 7, 2011

Review: ECOS 50200

It slices! It dieces! But wait- there's more!


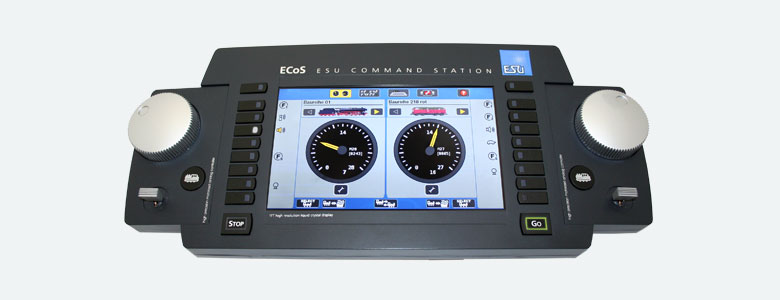
The ECOS is IMO far and away the most attractive controller on the market. See Jerry Quinn's excellent comments on the sorry state of dcc aesthetics here. The ECOS does everything I'm aware one could want such a unit it do, and it does it well insofar as I've observed. The UI is good, the touchscreen is good, the color display looks good and overall it's very easy to work with.

Programming is really easy! Previously I used a Trix mobile station and in a word it is shit. Perhaps that set the bar low, but I love my ECOS. I have my layout mapped in it, I have all my engines with custom graphics (All the default icons are European, but you can upload your own). If you choose to use this with the radio control throttle you will be limited to their default iconic euro symbols however. (That is, you only get to see your fancy custom bitmaps on the touch screen).

The ECOS exists on my network! All computers in my house can see it. Software on my PCs can access it and manipulate the trains and switches. It can produce output via it's html interface, like logs and rosters. It's really easy to update with new versions of it's software. This is also how you upload your own locomotive images. I’ve made custom art for all my engines not already included, easy to photoshop, and looks great.

My ipad and iphone can see it too, and using iCab I can run my trains from both. The software updates seem to come every few months and have added new features each time. I'd liken it to getting an update for your iphone's iOS. Sometimes it's mainly bugs, sometimes it adds something cool. The key thing is that the software is an ongoing project, buying an ECOS is buying into a platform that's being actively developed, it's not just an appliance like other controllers.

I’ve tried out touchcab for the iphone/ipad and it works as advertised, though it seems more a novelty then a controller replacement.

The ESU website annoyingly requires your serial number before you can download firmware updates, and it’s verified manually, so I had to wait a few days to get it. A onetime issue, but an annoyance.

Complaints: The only real improvement I’d like to see is an upgrade to the quality of the plastics used for the housing. I want it to feel like it was made by Apple and not Acer. Also, it has no power button. You can shutdown the software but to power it down it must be unplugged. Odd.

Also, I have found that Fleishmann 6 pin NEM 651 decoders do not run smoothly with Railcom feedback enabled on the ECOS. I'm not sure who owns that bug, but it did cause me some annoyance.

Using the track mapping feature I spent about 45 minutes to map out my layout thus far. I can now tap the switches and uncouplers on the map to throw them, and the graphics update. Sweet. As a means of operating those however, I think the amount of attention the map requires makes it a little impractical, though, the little switch icons are kinda small. Still, the really important thing is that the ECOS can control it, which means my PC can, and my phone can, and with the sensors I plan to install the whole thing will run itself to a degree one day.

So there you go. Overall, a really nice box.

Thumbnails below, here's the day it arrived:


Scale Speed

I have an ECOS 50200 controller, which I plan to post about.  One of the nifty features of it is the ability to set a speed the displayed speed for each locomotive.  That is, you give it a speed value for each engine that represents what dialing in 100% speed corresponds to.  I'm a professional geek, and so I couldn't resist.

I looked up the published top speeds of each of my locomotives (thanks wiki) and made a spreadsheet.  Then using Anyrail (which I totally recommend BTW) I created a simple loop of kato unitrack, measured it in software as being 3.51m long, and them built it on a spare table.  3.51m scales up to 561 real meters, so that seemed big enough to get a reasonable sample.  Because it's unitrack I know exactly how long a loop it is, there's no fuzzy numbers, easy peasy.   So, my next step was to work out how long a lap should take each engine when running at their real max speed, in scale.  I worked that out in my excel sheet and came up with this table:


CE 6/8 Green
65
11.3
31.1
BR Class 48
70
12.2
28.9
SBB AE 8/14
100
17.4
20.2
SBB AM 4/4
140
24.3
14.4
CE 6/8 Brown
65
11.3
31.1
SBB AE 6/6 Green
125
21.7
16.2
DB V60
60
10.4
33.7
SBB RE 482 cargo
140
24.3
14.4
S 3/6 Green
120
20.8
16.8
SBB AE 4/4
140
24.3
14.4
CN SD40-2
105
18.2
19.3
DB V300
120
20.8
16.8
SBB AE 6/6 Red
125
21.7
16.2


So now all that was left to do was run each engine about a lap, time it, and adjust the CVs for max speed till they were as close as possible to the number in the right hand column.   The Selectrix locomotives, having fewer speed steps, were hard to get dialed in right, but other than that it was trouble free and rather rewarding.

So what's the end result?  On my ECOS unit I can now take any locomotive, set it for 60 KMH, and get that actual speed, in scale.  It's not all exact, but it's close, which is all I care about.  No longer are my crocodiles passing the AM 4/4, and so I am happy.


Also of note, the one Kato engine I have was doing over 450 scale KMH with factory settings on a MRC decoder.  Yikes.


The Masterplan

It seems every 2-3 weeks I update my plan, but as of today, here's the snapshot of what I'm building.


Dashed rails are in tunnel or under the table.  The double mainline along the right hand side, right up against the wall, is hidden by a ridge line but not actually covered.   The Blue/Yellow track is all built and wired, the purple/green has yet to be constructed.   The numbers in the image show elevation in mm and % grades.

New toys and materials

A package of goodies arrived today with my latest order from eurorailhobbies.com. I got a small engine shed kit which I promptly built, 2 Faller viaduct kits which I plan to kitbash into a double wide viaduct to cross my little river, some wall texture material and a cd from Noch with paper card kit low relief models for alpine landscapes. I'll post images of each of these as I use them.

The Shed:
I ordered this little shed thinking I'd put it at the end of a spur line and it could house my V60 switcher.

Well, it is a very simple kit, I spent maybe 90 minutes on it and just did some basic painting/weathering so it wouldn't look fresh out of the box.  I don't have a ready spot on my layout for it, no scenery is even started yet, so there's not much point in detailing it yet.

Anyhow, I put it down on some green plywood and snapped a few images on my phone to share with the world.  And guess what?  The V60 does not fit!  My smallest engine is too long.   It almost gets in there, but the doors certainly can't close.   So, on a scale of 1 to 10 I'd have to say I'm mildly disappointed.

See for yourself:


It won't fit!


June 5, 2011

REVIEW: Trix CE 6/8 Swiss Crocodile 12413

Swiss Federal Railways class Ce 6/8


This is my first locomotive.  This is the reason I picked the Gotthard line as my subject.  The availability of this one model set in motion many years of activity, and there shall be many more to come.   This engine is articulated, it bends, so on a curve it literally curves with the line.  Take a look at the wheels, the pushrods, this engine seems to bridge the gap between the steam and modern eras.  Once warmed up this engine is a good runner, though the small end wheels can be finicky about bad track or switches.

The SX decoder in here has the stink of yesterday's technology to it- not very customizable, not many speed steps, but it also is the best option I've had thus far.  Roco also makes a Swiss crocodile, I have it, and theirs can take an NEM 651 6 pin decoder (on a harness) but it's ridiculously hard to install.  See my future post on this.  I cannot imagine why Trix and Fleishmann do not offer a DCC crocodile today, I know I'd snap one up, as would many others.


The manufacturer says:


Built starting in 1926. World famous electric heavy freight locomotive type, known as The Crocodile. 


Model: Era III, comes with built-in Selectrix Decoder, motor with bell-shaped armature, 6 axles powered, 4 traction tires. Length over buffers 125 mm.

A specially heavy, powerful locomotive able to master steep grades on a curving line was needed for freight service on the Gotthard route. Locomotives were developed in the classes Be 6/8 III and Ce 6/8 III.  The articulated design of these units fulfilled the long-standing requirement for trouble-free transport of freight over the Gotthard.


REVIEW: Trix AM 4/4 12518


This engine is special to me.   It was produced in a limited run in 2005, it has a factory installed selectrix decoder and I got mine from a shop in Switzerland after an odd flurry of emails made possible by Google translate.  It is a supremely smooth runner, it's solid, heavy, and reeks of quality.  

Update 1/10/15: one of the drive axels has lost its gear!  The result is the gear mechanism is unbalanced and so the locomotive simply will not run.   I'm deeply saddened, as this was a favourite.   I bought a dead DC Minitrix v200 off of eBay hoping to scavenge it for parts but it was mechanically different.   I looked up the pro on the Minitrix web site and they have no stock, so unless one of you can point me in the right direction I think this engine is retired.


The manufacturer says:
Swiss Federal Railways class Am 4/4, B-B wheel arrangement. Built starting in 1953 as the class V 200.0 for the German Federal Railroad 


Use: Medium and heavy express trains and fast passenger trains. 


Model: Era IV. Die-cast metal body and frame. • Powerful can motor (with bell-shaped armature) with a flywheel • Digital connector • close coupler mechanism Headlight / marker light changeover, 4 axles powered, 2 traction tires Length over the buffers 115 mm / 4-1/2". 


This model is being produced only in 2005 in a one-time series.


The fact that the German Federal Railroad retired the class 220 did not automatically mean the end of this successful class. Many of these locomotives were acquired by other railroads and overhauled for new uses, including track laying work in Saudi Arabia and in Switzerland, where the class 220 was used for an even longer period of time.

Beginning the river

My layout plan has always featured a large bridge as a focal point.  This week I started building this portion of the layout.  In order to give the bridge more height I wanted to lower the table the bridge spawns, so I built the benchwork below. 


My valley is 80mm lower then the surrounding terrain and 300mm wide. This will allow the use of Faller viaduct rail bridges to spawn it for the lower line.  I then built a placeholder for my big bridge, so I wouldn't damage my model while working on the area.  As you can see the Faller viaduct piers will need a little extension to meet the track height.  I've now roughed in some basic riverbank shapes with that green foam used for flower arrangement.

REVIEW: Minitrix Bavarian S 3/6 #12259


I say:

This is a very pretty locomotive but I cannot recommend it.    It's operational characteristics are very poor.  I want this to be excellent, I wish this was my favorite, but it just does not work well.   The audio fails.  It produces random sounds more often than not.   When it work, it does not last.   Run this train for  a while and sooner or later the audio will go horribly wrong.  Reset CV 910 to 1 to fix the issue, but only for a while, and only for the forward running sounds.  Unreliable.  Reversing sounds seem truncated as well.  Sometimes the reversing movement is jittery too.  It's very pretty, and it cost a pretty penny, it's a real shame that it's one really cool feature does not work well.   I suggest you avoid the sound equipped model, and I say this as someone who loves DCC sound.   It's not worth the grief in this case.

I probably should send it back, but the last time I had a defect issue with a Trix train it took a year to get the engine returned, so I'm not inclined to go through that hassle again.


I found this thread on a German language board discussing issues with this model:


2/4/12 UPDATE: I've sent this back to Trix for repairs.  It's worth it, otherwise this is just a very pricy paperweight.  Will let you all know how it goes.

1/10/15 UPDATE:  Wow!  It been three years and today I finally have closure.  I just heard from the shop that the factory has lost it!  Well, not a huge sunrise, given the timeline, but here's the good news:  the factory issued a credit to the shop and the shop then to me.   So, while I lost what was doubtlessly my most attractive locomotive, bar none, I did get the please of it for some months, and now I get to spend that money again.   Yes, it's certainly inconvenient that it went wrong and I do miss it and probably would have replaced it with the same were it still available, but I feel both the store and factory have done the right thing given the circumstance.  The store is www.eurorailhobbies.com and I entirely recommend them to anyone in North America interested in continental trains.   

So, it's been less then 24 hours, has the money already burnt a hole in my pocket?   You bet!  I've just ordered the Minitrix SBB RAM TEE 4 car rail set, with factory DCC and sound!   Hopefully this unit will have a happier life then my last Trix factory sound loco.   Somewhat worrying is the fact that both are of the same generation of had ware, but I hope my poor lost 3/6 was just an anomaly.


The manufacturer says:

Prototype: Royal Bavarian State Railroad (K.Bay.Sts.B.) class S 3/6 express locomotive. Early production run with a streamlined engineer's cab and gas lighting. Used for fast passenger trains, express trains, and cross-border long distance trains. Era I.

Model: The locomotive and tender are constructed of die-cast metal. The locomotive has a powerful motor with a bell-shaped armature and a flywheel. The motor and the gear drive are built into the locomotive. 3 axles powered. Traction tires. The locomotive has a digital decoder for DCC, Selectrix, and conventional operation, built into the tender. The sound effects circuit with a speaker is also built into the tender. The headlights change over with the direction of travel and There is a close coupling between the locomotive and the tender. Length over the buffers 134 mm / 5-1/4".

REVIEW: MiniTrix AE 8/14 #12426


With so many wheels, this locomotive seems to have issues on switches and poor track.  It's a bit finicky.  It has lots of pull however, being two locomotives permanently paired together.  The DCC install was easy, a standard NEW 6 pin plugs right in.  Electrical details on the roof look great, as does the external transmission mechanism and all the windows.  Overall, this locomotive has great presence on the layout.  I recommend it, provided you're confident in your layout build quality.  It runs flawlessly on my layout now, but only after much careful debugging.  In some ways owning this locomotive serves a forcing function, in that it's a trouble spot detector!  

Mechanically it's a little noisy, but that seems fitting for it's subject.  

The images below show weathering, as applied by me. 


The manufacturer says:
Swiss Federal Railways (SBB) class Ae 8/14. Built starting in 1931. Used for heavy freight trains on the Gotthard route.


The rail lines in Switzerland with their grades, tunnels, bridges, and curves are a special challenge for the locomotives that travel over them. Mastering the 240 kilometer / 150 mile Gotthard line in demanded extraordinarily powerful locomotives over the years. The Crocodile freight locomotive became famous on this line but the largest and most powerful locomotives were the class AE 8/14 electric locomotives. They were developed in the 1930s just for the demanding requirements of this steeply graded line. Each of these double locomotives had a weight of 240 metric tons. The 8 traction motors for the locomotive gave a starting tractive effort of 50 metric tons and an hourly output of 7,500 horsepower that was transmitted by the proven Buchli drive system from the Ae 4/7.


The locomotive has a die-cast metal frame, with a digital connector, one motor for each locomotive half, 8 powered axles, a close coupling between both locomotive halves and a close coupler mechanism at both ends. Length over the buffers 212 mm / 8-3/8".


UPDATE 1/10/15:  this locomotive is one of two that I own that constantly derails on my layout.  It has trouble with points, the small running wheels on either end go off very easily, I suspect because there is very little weight keeping them down on my thin code 55 rail.   I hope to once again slowly debug all the issues I've apparently introduced with my ballasting but I must say this locomotive is quite a pain.   Still, I love how it looks!