November 26, 2011

Beauty Peel: Before and After

Today I added a second and third layer of flocking, filled some patches, painted my retaining wall, and some new textures about the tracks.  Then after a few hours of drying time I peeled away the masking materials.  Boom!  Everything suddenly looks better!   This is such a fun time in the whole process.   One thing that struck me how shiny my rails are.  I've always planned to weather them but never flet an urgency before.

Before
After

Under Wraps
Voila!
Where's the track?
Ta-Da!

Before
I used an unfortunately wide tape here, but it's easily corrected.

Look how shiny it is!   I must weather this soon!


Bonus geekery: Can you spot the TARDIS?  She's in two of the above...

November 23, 2011

Get Flocked!

Applying ground cover flocking is like magic!  Suddenly my plaster cloth landscape has lept to life.   I've just started mind you, there's lots of layers and detailing to come, but tonight I applied a base coat to a hill section and I just love it.   As you view these images please remember it's a work in progress, the best is yet to come!


November 22, 2011

A few coats of paint later....

Progress on my rock wall, using very diluted paints and a spray bottle.  Not a method for the faint of heart!  Sure, the walls will never be quite the same again, but the eventual backdrop will hide all, right?

A thin coat of black, then grey, then water to blur it all together:


After some drying time I brushed on grimy black on the brightest surfaces, plus deep into cracks and on the undersides of rocks to add some depth.  Then I applied a thin coat of light grey, then more black, then a little white and a big water wash...   We'll see how this dries.  Matching the existing rock may prove to be trouble...


And finally, a day later and a new coat of lighter grey highlights and suddenly it all looks better!


November 21, 2011

Quick Kit Review: Kibri 37032 Church of the Gotthardbahn


Design:  The kit is well designed.  It appears to be a modern mould, the visible seams are minimized when assembled, the flash is minimal and the sprunes had adequate trimming space.  Rating: A

Quality:  The walls are unusually thick, much more so then is the norm in N scale structures and the thin parts are about as good as one gets in a modern 1:700 scale ship (ie. impressively thin).   I was pleasantly surprised. The factory colours are not to my taste, but I never build an unpainted kit so a non issue for me. The Photo on the box suggests a common blue hue for the dome and stonework which is misleading, as they are cast from separate plastics, one green, the other grey.  Rating: A

Documentation:  Typical of Kibri the documentation is a little lacking.  The parts are numbered from 7000 to 8000 over several sprunes, rather then the standard A1, A2, A3...B1, B2, B3... and the instructions are a series of images that cram too much detail into too few panels.   It's not unbuildable, clearly, but it's not on par with a modern Faller kit either.  Rating: C

Decals and Details:  The decal sheet does not match the decals illustrated in the instructions.  The instructions on the window decals are not very clear, but the effect once used correctly is impressive.  The windows are a translucent yellow with a crosshatch which looks great.   The snowbreaks on the roof are finely moulded.  Rating: B

Build:  I'm very pleased with how this came out.  The church makes an impressive structure, looks great, and fits my chosen subject area perfectly.  Rating: A

Overall Rating: A (Not an average)

Click to enlarge

The original:


This last image is a print, you can buy it here:


November 19, 2011

Check out my rocks

More mountains means more rocks, so last night I mixed up a double batch of hydrocal.  My local hobby shop stocks a brand that comes with various pigments, I find this serves no purpose as my rocks will be painted long before I'm done, but it costs less then the woodland scenics product so why not.   That said, I'd recommend looking at plaster.com, as I wish I had known about them before I started.   

Anyhow, I made 10 moulds worth of rocks and let them dry overnight: 


This morning I attached these to the layout, using Surebond white glue.  I've had better results with this stuff then with a glue gun, and it's much less mess then trying to stick them on with new hydrocal, which has little tensile strength anyhow.


Don't let the wet glue scare you.  Next step will be casting and attaching more rocks, and then painting, which ill be a future post.


UPDATE:   Lots more rocks added, and a retaining wall too!


This is how the sausage is made, do not be alarmed, it'll clean up nice.

November 18, 2011

New Structures: Rebuilding a used castle!

A few weeks ago I bought a used N scale castle from my local hobby shop.  I think it was part of a lot from an estate sale.   It was in pretty rough condition but I thought I might be able to rehabilitate it.

It was a Kibri kit, below is the manufacturers rendition:


And here's what I picked up for cheap:


You will have to click on the above to really see how ugly it is   The seams on the walls, the paint, the orange ground, the glossy roof...  It begs many questions.   Worst of all, whoever built this kit made no effort to produce something good.   The casting marks are all over the parts, the points of attachment to the sprunes have not been clipped nor sanded, parts were just glued together haphazardly.  Doors and windows were askew.  Worst of all, those walls!

I suppose I should have bene tipped off by the manufacturers photo- each wall segment joint is covered by some flocking material, so even in the best possible rendition this kit is a little rough.  Once I disassembled it and started sanding and fitting parts I found that even in the best case the results will be sub par, as the moulds this was cast from are clearly dated.   In fact, there's a copy write on a baseplate fr West Germany!  A modern kit this was not.

Anyhow, I tool it all apart, sanded the fitting edges, trimmed the injection marks, scrapped off the excessive old glue and then repainted it.  Once dry it came back together without too much fuss, but in retrospect I should have taken more photos of the before state, it would have made it easier.

Here's my end result:


   I chose to discard the extra base section it came with (seen in the top photo) because as my wife pointed out, it looked like it was perched atop a volcano!

More mountains!


Over the past few weeks my rail empire has been the scene of neglect, as I've been very focused on work of late.  My work project just passed a major milestone and now I find myself with time again for life, and that includes my trains!   I have a broad goal of making things both operational and presentable by Christmas, as family and friends will be visiting, and so with that in mind I've forged ahead in my construction efforts.

I began my mountain making by balling up newsprint and taping it in place, to give my mountain some internal structure.   As advised by others online I balled my paper inward, ensuring that the edges of the paper were all curled inside and underneath and the top facing portion of each crumpled paper ball was smooth.  This prevents harsh edges which can give the plaster cloth an odd appearance.

If I were a more dillagent blogger I'd now share images of my newspaper mountains.   Balls of paper wadded up and securely taped in roughly mountain shaped piles.  However, I am not, so I leave this to your imagination.

Next I cut plaster cloth into strips.  I pre snipped 4 rolls, so I wouldn't have to stop once I began plastering.  Once ready I used a paint roller pan to dip my plaster and applied the strips to to my structure.   I used a staple gun to anchor the plaster where there was a convenient wooden edge to use.  Once the basic structure was complete I left it alone for 24 hours to dry.

Again, were I more on the ball I'd now offer up images of a damp white plaster mountain-scape.

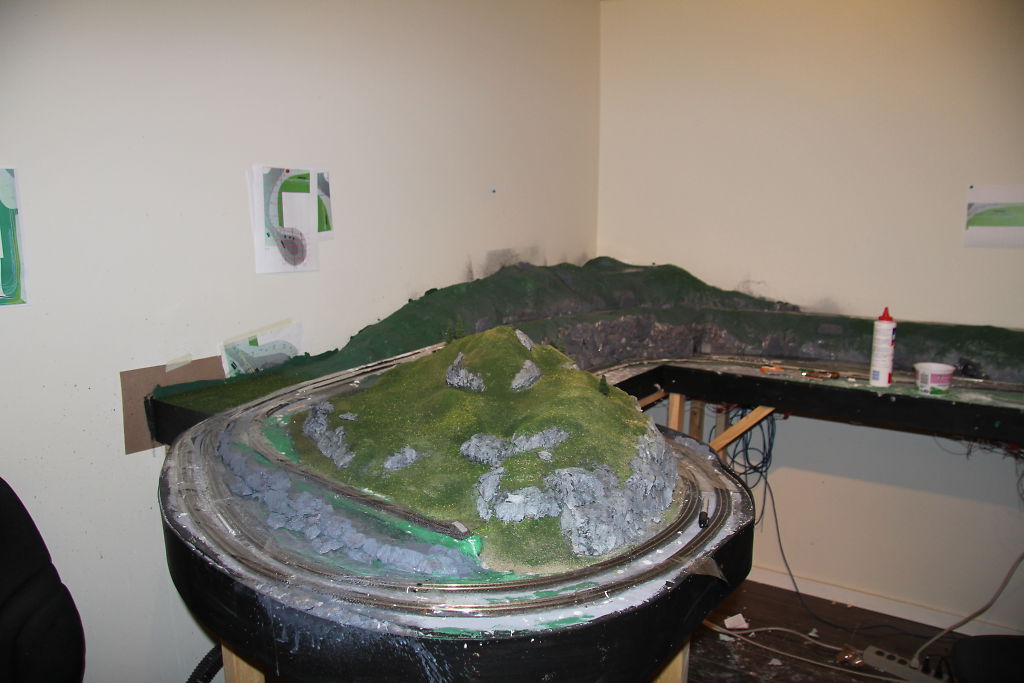
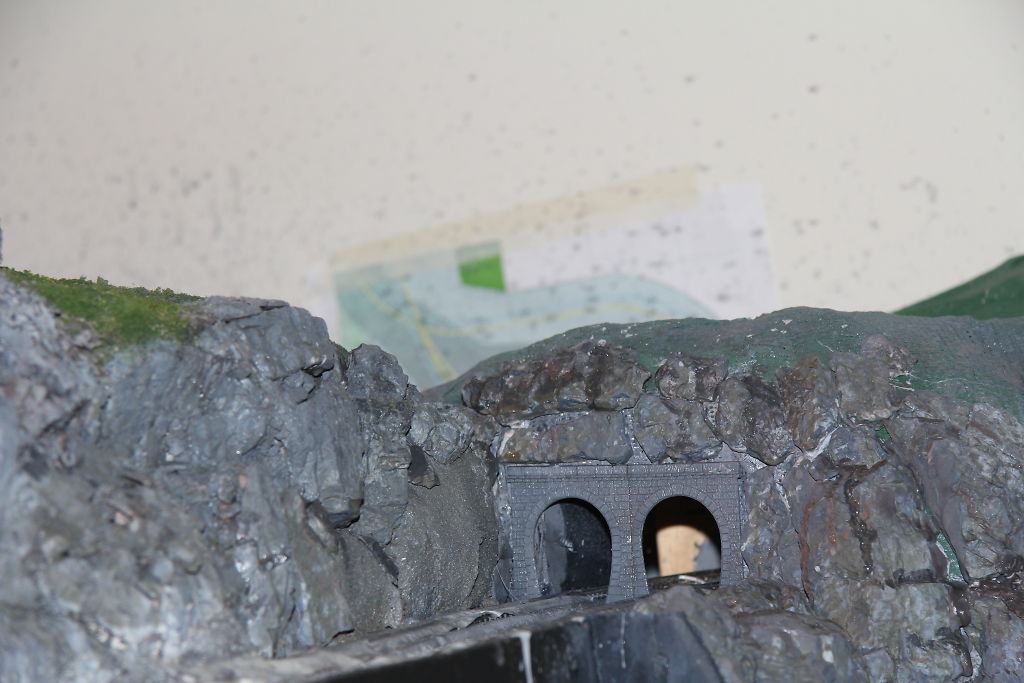
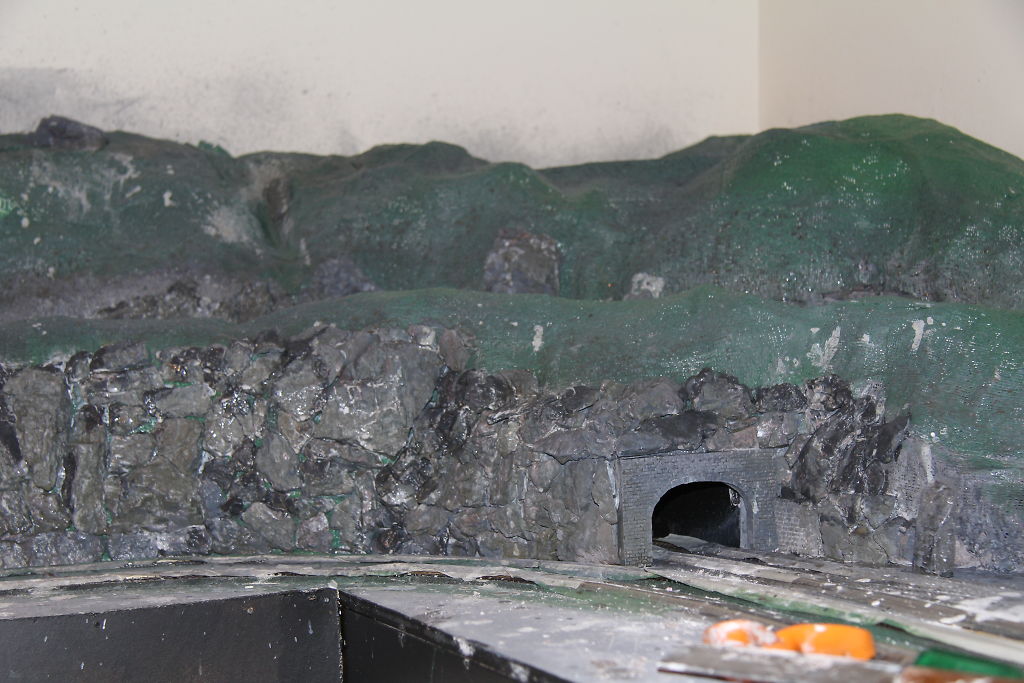
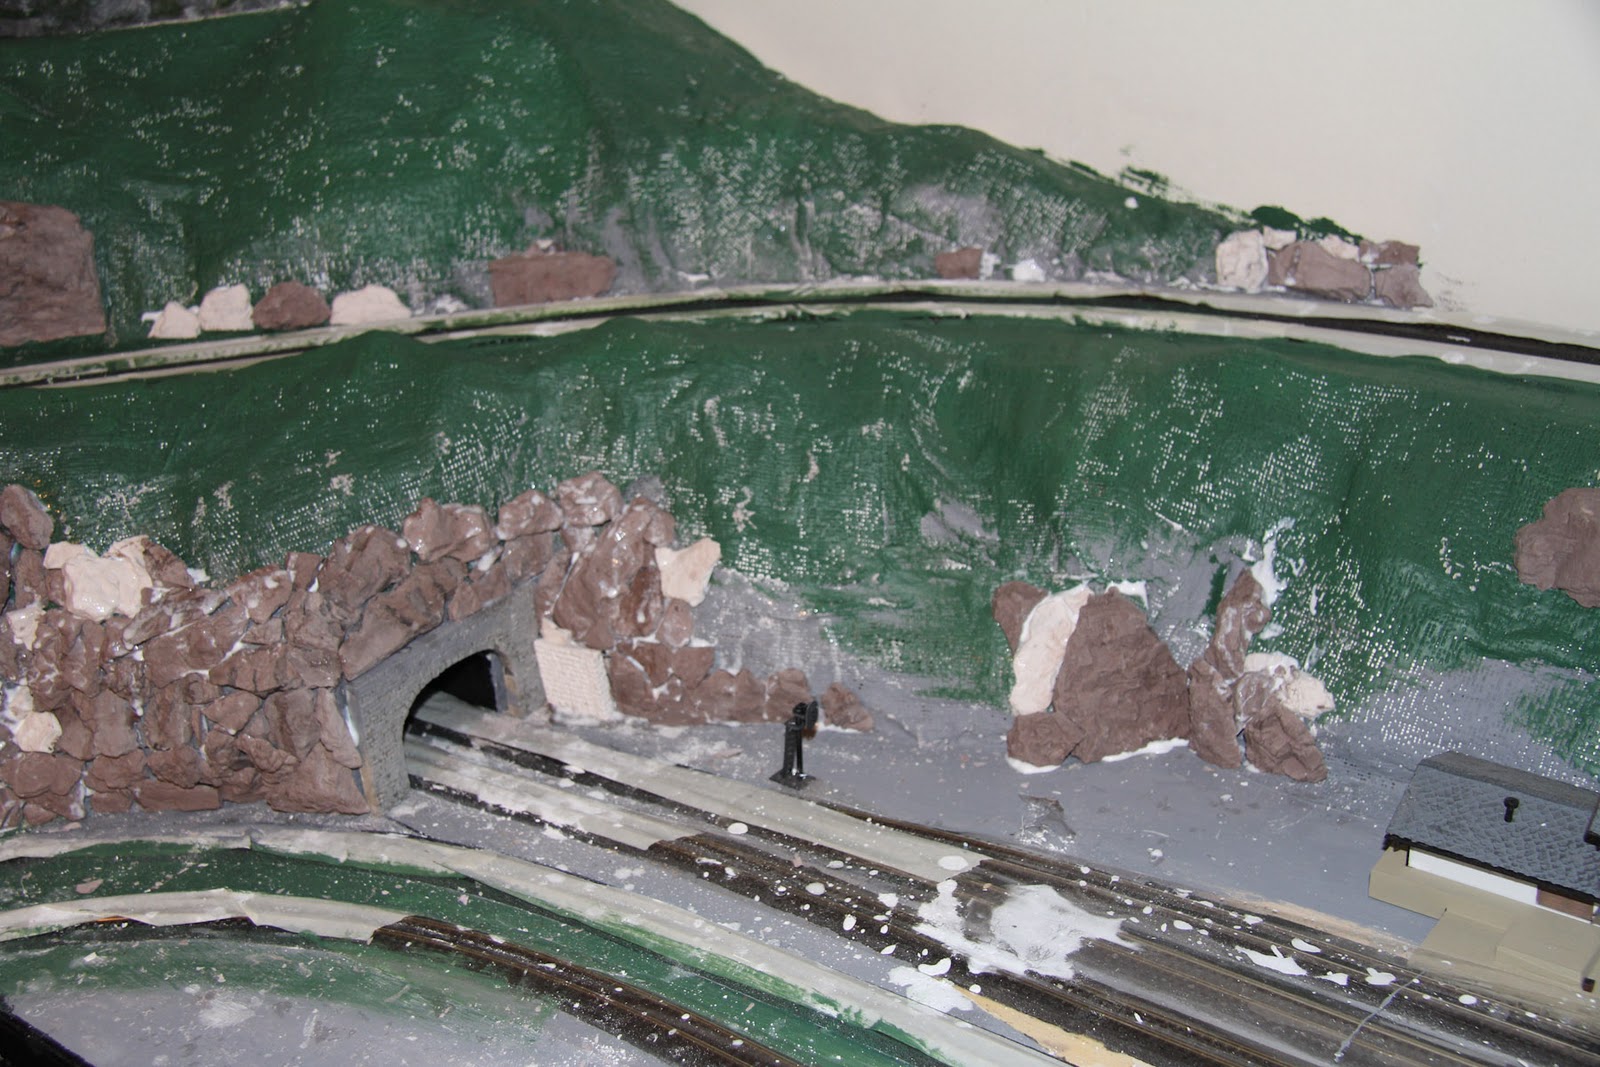
The next day I applied more plaster cloth, paying attention to layer it wherever it was weakest.   This was followed by another 24 hour wait.   Once it had hardened I painted, as you can see below.  This paint is an undercoat, it's purpose is to prevent ugly white plaster from peeking through the ground cover.  It also helps me visualize where the rocks will go.


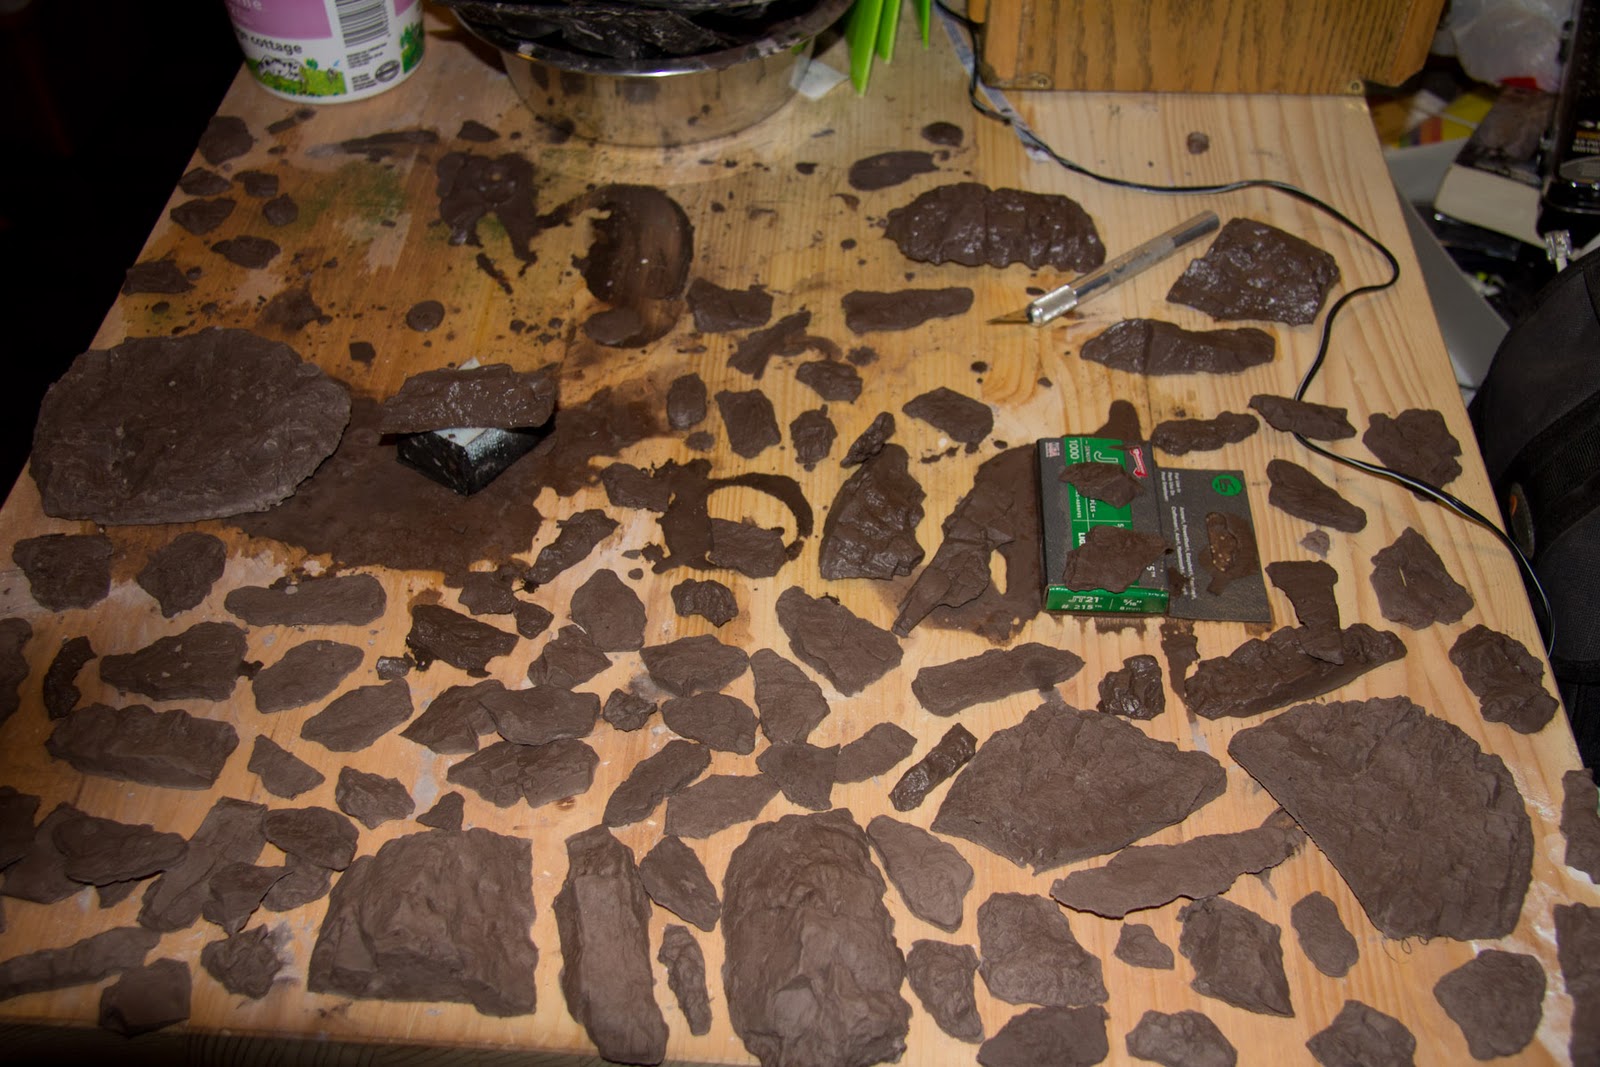
My next step will be to cast rocks, and then attach and paint them and after that comes the ground cover, but I will reserve those topics for later posts.