February 26, 2012

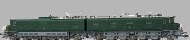
REVIEW: MiniTrix 12455 DB V300 with Sound


I have heard very few people say good things about sound in N scale.  Well, I'm about to buck the trend.  This V300 has been rock solid, both as a locomotive and as a locomotive with sound.  That is, even if it didn't have sound, I'd be very happy with it, and the sound performance has been flawless.
Is it loud enough: Yes.  It's really loud.  I have the volume set at 150/255 and find it really loud.  I don't want to turn it up more.

Is the sound distorted?   Does is sound bad when turned up?  No!   It sounds good, all the time.

How many sounds:  Start up, Shut down, various rev ranges, wheel squeal, and air brake release, horn and whistle.

The DCC interface from the factory has been trouble free.

So, I've been very happy with this engine.  I guess my only complaint is that when there's dirt on the rails that creates a power interruption you can hear this revving down when it stops, and then if it recovers it revs back up again as it pulls away.   If you're not looking it it, by listening only, you may think something peculiar is going on, but it makes sense.  If the alternative is it coming to a dead and silent stop I don't think I can complain much, and as is it's great for spotting trouble on your rails.  

Overall, I'd give this a 9/10.  This locomotive is singularly the reason I continue to believe in N scale sound, and keep rolling the dice looking for similarly good performers.  I've preordered a new Fleischmann 460 with sound which I've read good things about, I just hope it lives up to this.

Here's a video I found on You Tube this will give you a good taste of what this thing sounds like:


From the Manufacturer:
German Federal Railroad (DB) class V 300 general-purpose heavy diesel hydraulic locomotive. Built in 1957 by Krauss-Maffei as the type ML 2200 C'C', remotored in 1959 as the type ML 3000 C'C'. The locomotive looks as it did from 1964 to 1968. Era III.
The locomotive frame is die-cast metal. The locomotive has a digital decoder for DCC, Selectrix, and conventional operation. It also has a sound effects circuit with many operating sounds, diesel motor, horn sounds, blower motors, and others. The locomotive has a 5-pole motor with 2 flywheels. 4 axles powered. Traction tires. The headlights and marker lights are LED's and can be controlled digitally. The engineer's cabs have interior details in relief. The locomotive has a close coupler mechanism. Length over the buffers 127 mm / 5".


Digital version for DCC and Selectrix, with sound functions.

E94 Update

A while back I posted about some issues I had been having with my Fleischmann E94.  As you may recall my decoder on hand didn't fit.  What I didn't mention is that the E94 is just slightly taller than anything else I own, and it was getting stuck in one of my tunnels.  The rise from under the table had the top of the E94's pantograph hitting the plywood underneath my roundhouse building.  Because that structure is integrated with tracks, it's no simple job to list it out and cut a new bigger hole in the wood.

I had tried a fix earlier, using a course wood file and a Dremel tool to take a little wood away but to no avail.  Working from under the table was extremely awkward with the file, I just could not apply any force to it, and my sad little wireless Dremel was not up to the task.  I had a Dremel Stylus and found that it just didn't have the power to do more then scratch the wood.  Now, this being the only Dremel tool I owned, I assumed that this was what they were, and what they were was not very good.  I probably offered some detailed opinions on the subject because for Christmas my wife gave me a new Dremel, and this new one is good.

What a difference having the right tool makes!  This new Dremel made the job easy, I spent maybe 30 minutes on it, tops.  The only thing I had to be careful of was not setting the table on fire, because the sanding head never bogged down once.  The funny thing is I had considered replacing my old Dremel before but didn't think I needed a new one, because it was a pretty useless tool.  I thought a fractionally better one would be similarly useless, only slightly less so.  Well, I was wrong. This new one is many orders of magnitude better and I just wanted to share the experience with you all in case your find yourselves mired with bad tools.

My E94 now can traverse the whole of my layout.  I feel like I just got a new engine!


An ECOS Update, A Camera Car, and my Class 37 Lives!

Reports of the death of my My British Rail Class 37 were apparently exaggerated.  I looked up my repair options yesterday and was preparing to ship this engine back to England but decided to tinker with it one last time.  I found the power connection between the PC board and the chassis (it's built North American style, where the weight is split down the center and carries the current!) and poked at it and voila!  All better!


I'm very pleased to have this back in operation again.  Also, if you happen to find yourself in York, I can thoroughly recommend the Monk Bar Model Shop, as it made me sorely miss the great hobby shops I grew up with.  The staff really know their stuff.


Camera Car A few weeks ago I bought a WiFi camera and USB receiver on eBay, like this:.  
I cannot recommend it, not yet at least.  The software it comes with is beyond poor, but it does work. I'll be posting a video made with this toy soon and you can judge for yourself.

On my first attempt to use it I found it the camera made the car I butchered for it top heavy- it tipped in corners, even at very low speed.  On straights it also wobbled something terrible.  Granted, my effort (seen below) was rather crude, but I did learn from the experience.

The battery was to help balance the weight on the car.  Didn't work well.

The key seemed to be stability and size.  Out of the box it's a little big for n scale so I knew I'd need to take it apart and loose the housing.  I bought a North American well style cargo container car to use as a new platform, the cheapest model I could find of one of these:


The beauty of a well car is that it has storage space very low to ground, and so a very low center of gravity.  I ripped off all of the details, which were few, and using model ship strip wood built a wooden platform in the bottom and then added a layer of lead fishing weights and solder as balast, and then capped that with another layer of wood.   I then removed the camera from it's case, mounted the guts to the well and the lens to front of the car and I had a super stable camera platform.  It''s not pretty, but it does the job.


What's the video quality like? Well, I'll edit something nice together sooner or later.  The raw feed is pretty iffy and the included software is just crap.

Live from the tracks!
In tunnels the WiFi signal drops out so I plan to look at extending the antenna.  I think I can make a long one and have it spread over several cars.  More on this in future posts.

ECOS 50200 v3.4.3

A few weeks ago ESU released a minor update for the ECOS.  It's mainly bug fixes, but there are a few tweaks I really like.  First, they have added a save option in one of the config screens, which means you no longer have to hold down the stop button to power cycle the unit for force a store.  Also, when connected with a browser you can reset the ECOS remotely, so if you are uploading train icons you can cycle the ECOS without having to power down, which really speeds things up.   The only other big new add for me was the addition of a track crossing icon for the mapping mode.

And with the above goodness comes the not so good.  Updating will also wipe out your user defined locomotive images, all your switches, and your layout map.  ESU gives you a convenient way to back these up via HTTP but if you are really excited about new firmware like say, me, you may forget to do this.  Happily I'm now largely controlling everything from the PC and Train Controller anyhow, so it was just a matter of restoring my icons.

ESU hosts a large library of icons for the ECOS, but they rarely seem to have just what I want.  I'm a bit fussy I guess, so I want all mine to be in about the same scale, all facing the same way, and all with a background matching the system color.  For these reasons I've spent many hours photoshopping exactly the icons I want.  Perhaps they are of some value to a few of you, I'll put them at the end of this post.


February 22, 2012

Micro Update

Hi all, sorry for the lack of updates of late but it's been a busy time.  Here's what's new:

- I now have 24 sensors installed and with them have run 4 locomotives simultaneously for 30 minutes entirely under computer control, with the system throwing switches, picking routes, letting trains pass one another all without incident.
- I have discovered one of my locomotives, a Bachmann British Rail Class 37 souvenir from my trip to England last summer suddenly does not work.  It has previously been entirely reliable.  When I went to use it a few days ago it was unresponsive.  I've tried it with analog DC power as well, it's inert.  Contacts look good, decoder is properly seated, internal wires look fine, wheels are clean: I am at a loss.
- I dropped a locomotive!   My Minitrix SBB AM 4/4!  It fell about 2 feet and landed on it's wheels in a wooden drawer.   Now it's gears on both trucks are misaligned, it makes terrible noises and produced little pull.   This has lead me to realize that attrition through my own incompetence is probably the greatest long term risk my toys face.  Rather disheartening.

I'll have more later,

James


January 28, 2012

Control: Welcome Skynet

I for one welcome our new computer overlords!

That's why I've been busy handing over control of the layout to my computer.  I plan to post detailed reviews and comments on the software, hardware, setup and operation but for now this just a quick overview of what is new.

I had planned to use JMRI but found the support for track sensors somewhat lacking.  Yes, I can make my display show where the trains are, but I din't see an easy means of making the trains respond, to route them as a result of sensor input wrapped up in a nice UI.  So I needed new software, and didn't really know what.  Happily my vague impressions of rail enthusiast stereotypes was enough to guide me- let me explain.

There are well established stereotypes of model railroaders.  Americans build huge layouts in their giant basements and then go through comical efforts to role play the operations on their line, complete with little paper manifest cards and silly hats.  The British, on the other end of the spectrum, seem to have no space at all for layouts and so form clubs that work exceptionally hard to reproduce single stations or sidings.  Usually they focus on a single segment of a line that runs straight and terminates in their one station.  Once built they then exhibit their layouts on a region circuit of weekly rail shows, each small town gets one a year.  A ravenous public, starved of spare room, , gaps in wonderment at the fine detailing, which does seem to be exceptional.  And then there's the Germans.  The Germans seem bent on taking the human contact out of the hobby by over engineered massive yards that confuse the mind as they seemingly tessellate endless tracks and vastly improbable tracks running in every direction and  then making computers sort it all out.  Obviously, this appeals to me, so I bought German software.  After all, my layout attempts to combine the classic American style whole room of landscape with the German zeal for automation, and if I get good enough I'll aspire to UK style detailing too, but I'm a ways off there yet.

So the software.  I intend to rant in detail about the stupidity of the copy protection scheme.  It's so annoying it merits it's own post.  For now I'll just say that despite being able to download the full program and buy it online, the user has to then wait a few weeks for the vendor to mail out a hardware dongle. Seriously?  A dongle?  Argh!   (What's a dongle you ask?  It's a physical device you have to have plugged into your machine to run the software, something Autodesk used to use for 3D Studio Max and AutoCAD many years ago...you know, before the internet....)  Anyhow, it's been a week and I'm still waiting to actually use the software, but I have embedded 15 vertical reed switches between the sleepers along my track, wired them up to two s88n feedback modules and seem the lights on the controller lighting up as expected.  It's been fun, but now I need more parts.  I've just ordered another 17 switches (for 32 total) but I strongly suspect I will need another module and 16 more switches before I'm actually done.

Below is an image of the layout in TrainController, and on the right hand side is the same as the software sees it via the sensors.  You will notice that the right hand map has less detail, some sidings are missing, this is because it represents only what the system can monitor at present, as I add more it will gain a more complete picture.


Feedback Modules used: 2x LDT RM-88-N 16 fold standard feedback module.  Has worked very reliably with the ECOS, no trouble to report.   Used an old cat5e patch cable to chain 2 units, made the lengths needed for the sensor hookups much more reasonable.  Only downside is the high minimum order needed from the manufacturer.

Sensors Used:  Meder MK20/1 Reed Sensors.  So far, so good, but no operational experience yet.   Setup has been easy though.

Software (to be eventually) used: TrainController Bronze.  Still waiting for the dongle.  The documentation is good at least.